eco design

DYI Pallet Furniture Ideas – Easy, inexpensive & Eco Friendly

Wooden Palettes are sitting around everywhere around Montreal, waiting to be transformed. Originally they are used by businesses for big bulk shipments, but end up very often being abandoned or hanging around for months with no use or purpose at all.

This doesn’t have to be the case though, the pallets are made of good quality wood and can be reclaimed and recycled in to unique and useful projects. Pallets can be found everywhere at supermarkets, behind stores, in alleys, abandoned lots. Pretty much anywhere where there is large shipment transactions going on.

My advice to you based on my personal experience, if you want to create something with the pallets, just do it! Don’t be shy to ask the business managers or owners if you can take a few, and don’t be lazy either and make excuses that you have no way to get them. Organize for someone to help you pick the pallets up and help you deliver it to your place. If you don’t have any family or friends who are available at the time to help you, then do as I did and just put up a post on craigslist or Kijiji, in the gigs /labor section. Hire a man with a Van, it might cost a few extra bucks to help you move them but you will have something of value that you created, while at the same time being environmentally conscious and responsible.

Once you have them in your humble abode, all you need is a saw, hammer and nails, and of course your imagination! If your not too good with tools, there are many things you can create with the pallets without tools or having to take them a part.

Check out some of these interesting design ideas below. I’ve included some very simple but charming pallet furniture projects that anyone can do and some other more challenging ones for the more handy builders out there. I hope you create some beautiful creations. And don’t be afraid to push your limits, just because your not handy now, doesn’t mean that you can’t be tomorrow. Take out the drill, and use it! Don’t limit yourself by your gender either, be all that you dream of being.

We are always working on different unique Upcycling projects at Valhalla Montreal. If you would like to join in and help out with one, we are at the land every Saturday, and welcome anyone who has a calling to join in.

Wooden Pallet Coffee Table


Wooden Pallet Deck

Garden Path Made with Pallets

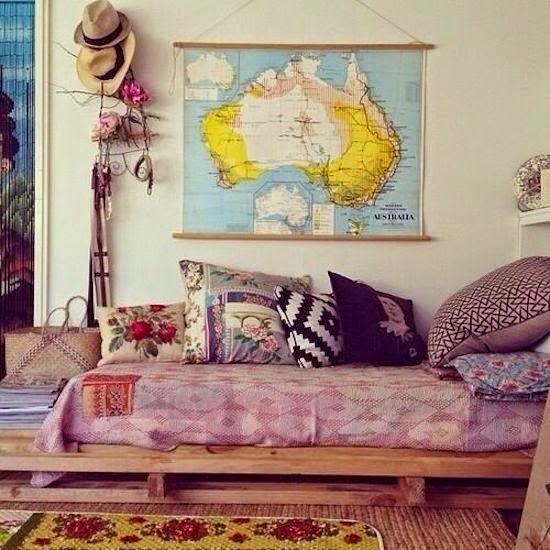
Wooden Pallet Bed with Storage Drawers


Wood Pallet Book/Magazine Shelf

Wooden Pallet Stair Case

Wooden Pallet Dog Bed

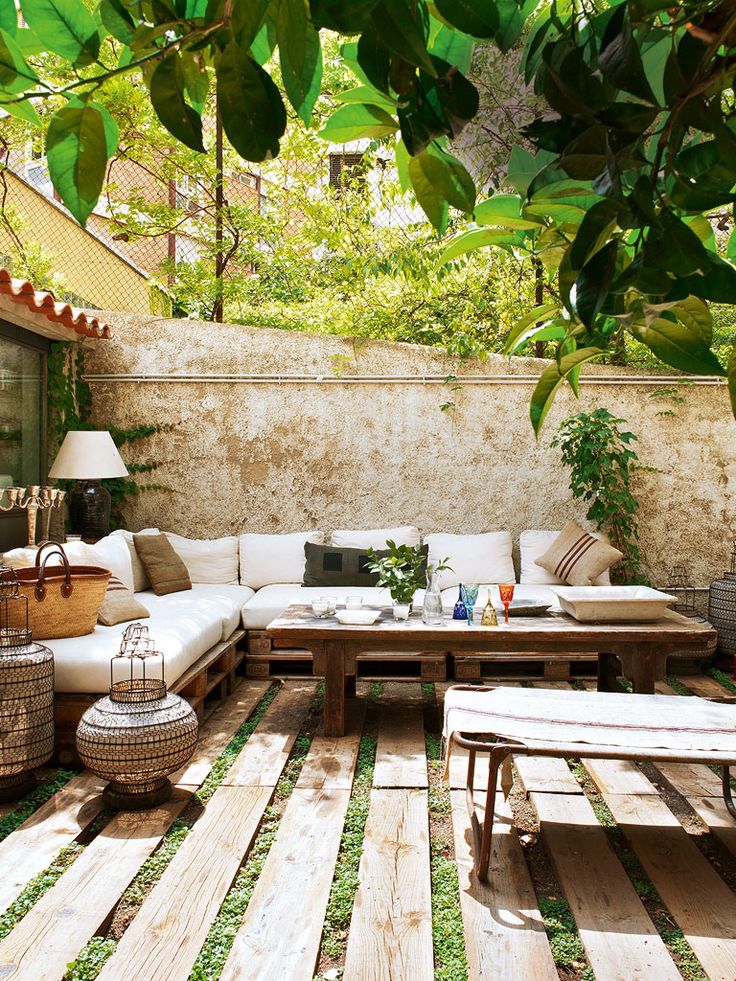
Wooden Pallet Outdoor Furniture


Romantic /Wedding Pallet Furniture


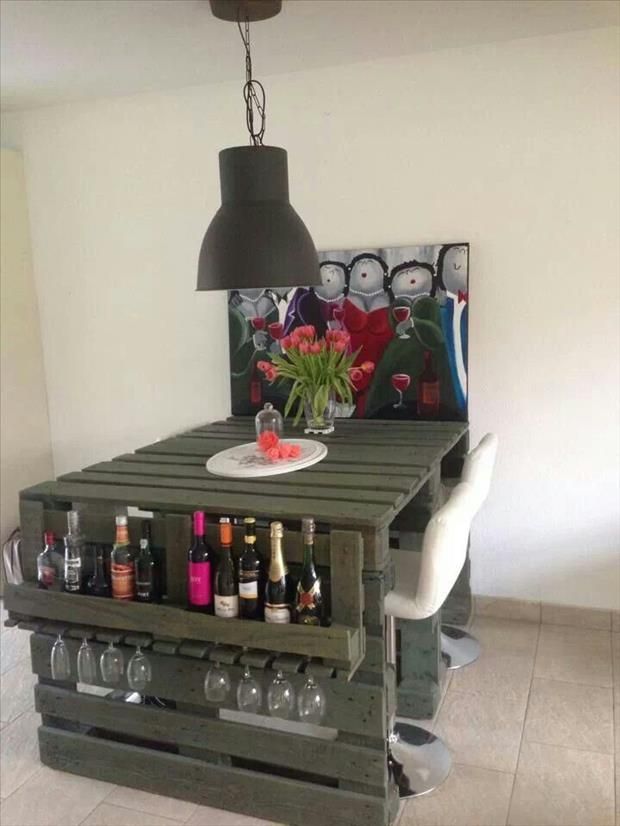
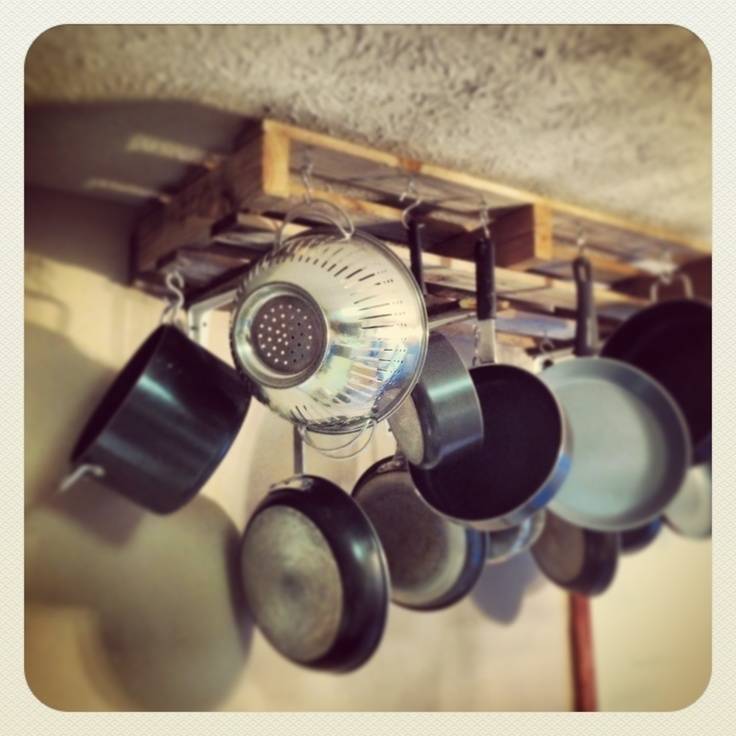
Kitchen Pallet Ideas

DYI Seed Bombs for wildflowers & Guerilla Gardening

I stumbled upon some alluring images the other day of colored seed bombs. I was interested in purchasing a few but they were sold out. Luckily there were no more left, because it only enforced my determination to learn more about them. I did a little research trying to find a local carrier, when it suddenly came to me why don’t I just make them myself!”

I remembered I had a bag of Wildflower seeds stacked away that I had bought not to long ago to attract hummingbirds. When I saw the ingredients called for clay, composte, water, and wildflower seeds I was really excited because I was already equipped and ready to go. There were a few different recipes to choose from, some with coloured recycled paper, but I opted for the more ancient traditional one made with clay. Since they lacked colour, I decided to just add a bit of rose petals, lavender, and calendula, elderberry seeds, and sumac in the mix to give it a subtle natural colour boost.

The plan is to Seed Bomb Valhalla this weekend! They say its best to bomb just before rainfall. Looking forward to see the mysterious flowers, that will one day miraculously bloom at Valhalla.

Ps: you might want to give people heads up that the seed bombs are not edible (hence clay & compost ) as you can see by the picture they could easily be mistaken for dessert 😉

What are Seed Bombs?

A seed bomb is a seed that has been wrapped in soil materials, usually a mixture of clay and compost, and then dried. Essentially, the seed is ‘pre-planted’ and can be sown by depositing the seed ball anywhere suitable for the species, keeping the seed safely until the proper germination window arises. Seed balls are an easy and sustainable way to cultivate plants in a way that provides a larger window of time when the sowing can occur. They also are a convenient dispersal mechanism for guerrilla gardeners and people with achy backs.

History

Seed bombs may have been used by the Ancient Egyptians to seed the receding banks of The Nile after annual floods. They have been used in Asia and elsewhere, especially in arid regions, because of their ability to keep the seeds safe until conditions are favorable for germination, and the ease at which they can be distributed.

In the Carolinas in the 1700’s, West African slaves, predominantly women, were brought in to cultivate rice using a seed ball technique that was used in Africa. Rice seeds were coated in clay, dried, and pressed into the mud flats with the heel of the foot. This served two purposes, protecting the seed from the birds, and also preventing it from floating off when the fields were flooded.

More recently, Japanese agricultural renegade, Masanobu Fukuoka, began exploring the use of seed balls (nendo dango in Japanese) to help improve food production in post WWII Japan. His research and outreach efforts has brought the seed ball back into the public eye. Today, seed balls are fun for green-minded kids and adults, and are also an important tool of the guerrilla gardening movement.

Ingredients

Air Dry Clay

Water

Compost

Wild flower Seeds ( preferably organic non gmo if possible)

*Optional: Dried Lavender, Elderberry seeds, Roses, Calendula, sumac for color.

Directions

For the dried clay mix 5 parts clay with 1 part compost and 1 part flower seeds, put some careful drops of water into the mixture (make sure not to make it into a goopy mess), Knead with hands into a ball, flatten it out and cut to desired size. Now just make into a small ball and let it dry in the sun. If you want to add color, roll the balls it to a tray of herbs.